Roof Valleys 101: Leaks, Additions & DIY Repair Risks
Roof valley leaking where an addition ties into your home? Learn why these spots leak, why DIY fixes fail, and what a proper professional repair involves.
When a Simple Roof Valley Turns Complicated
We recently got a call from a homeowner — let’s call him Mark — who sounded a little frustrated and a bit worried.
He told us he had a valley on the front of his house that was leaking. About 10–15 years ago he’d had an addition put on, and that addition created a valley where the new roof tied into the old one. A year or so ago, the valley started leaking. Like a lot of handy homeowners, Mark climbed up there himself, started pulling things apart, and quickly realized he was in over his head.
His story is extremely common. Roof valleys are one of the top places we see leaks, especially where additions connect to the original house. And they’re also one of the spots where DIY repairs most often go wrong.
What Exactly Is a Roof Valley?
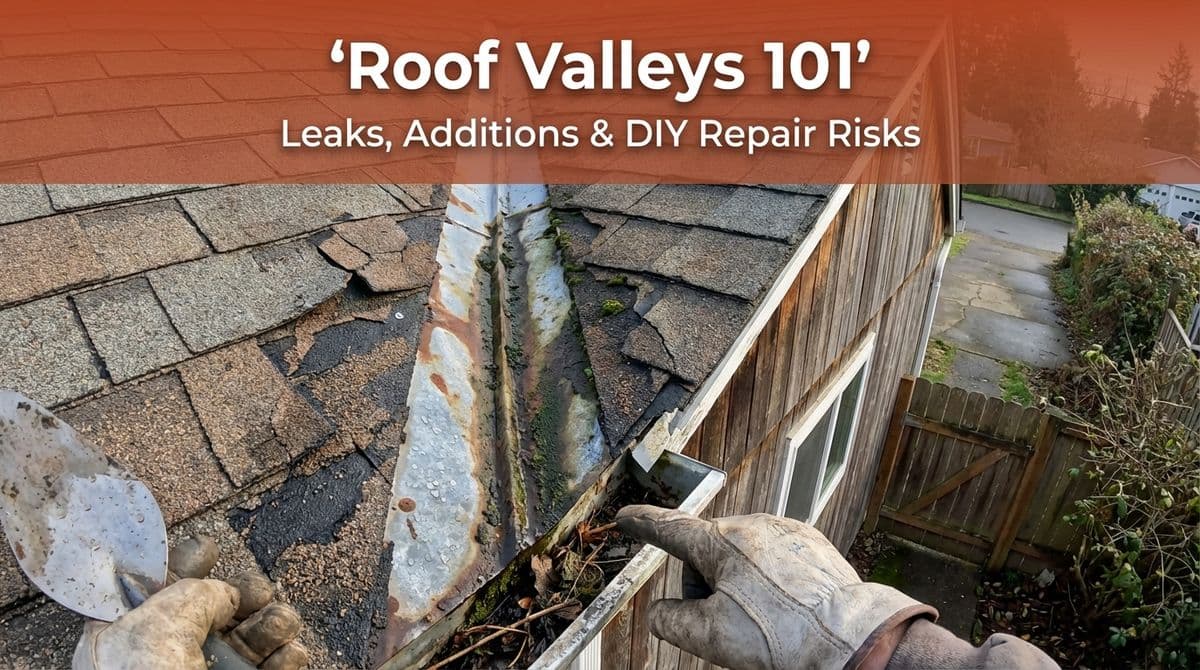
A roof valley is the line where two roof slopes meet and form an inside corner, creating a channel that carries water down the roof.
If you picture rain hitting your roof, most shingles shed water straight down. But anywhere two sections come together at an angle, water naturally concentrates in that groove — the valley. Because so much water and debris flow through this area, the valley has to be built and flashed correctly, or it will leak.
When you add a room, porch, or second-story addition, you almost always create new valleys where the new roof ties into the existing one. Those “marriage lines” between old and new roofs are some of the most leak-prone spots on a home.
Why Valleys Around Additions Leak So Often
In Mark’s case, the leak was right where the addition roof met the original front roof. That setup has a few built-in challenges:
- More water in one spot: The new roof plane can funnel even more water into the valley than the original design ever intended.
- Different ages of materials: One side of the valley may have older shingles, the other newer, so they age and move differently over time.
- Complex framing: Tying new rafters into old framing can create dips, humps, or slightly off angles that stress the valley metal and shingles.
- Shortcuts during the addition: Some contractors focus on interior finishes and treat the roof as an afterthought, using minimal flashing or skipping ice and water shield in the valley.
All of that means that even if the rest of the roof looks great, a poorly designed or aging valley can start leaking long before the shingles wear out.
Common Signs Your Roof Valley Has a Problem
Here are some of the things we look for when a homeowner calls us out for a suspected valley leak:
- Stains on ceilings or walls that line up roughly under a valley, especially after heavy rain.
- Water trails in the attic that seem to follow the valley line or show up near where an addition ties in.
- Granule build-up in gutters right below a valley, indicating accelerated wear in that area.
- Cracked, curling, or missing shingles right along the valley line.
- Exposed, rusted, or dented metal in an open valley, or lumpy, “soft” areas in a closed (shingle-covered) valley.
One important point: water can travel. You might see a stain in one room, but the actual entry point is several feet up the valley. That’s why a thorough inspection on top of the roof and in the attic is so important.
Why DIY Valley Repairs Often Go Wrong
When Mark climbed up and started pulling material off his valley, he ran into what most DIYers do: there’s a lot more going on under there than it first appears.
Here are a few reasons valley DIY repairs tend to fail:
- Hidden layers: A proper valley usually includes underlayment, often an ice and water barrier, valley metal or woven shingles, and then the main roof shingles. If you don’t rebuild all the layers correctly, water finds the weak spot.
- Nailing mistakes: Nailing too close to the valley centerline (or through metal in the wrong spot) can create instant leak points that might not show up until the next hard rain.
- Improper sealants: Caulk or roofing cement smeared over a bad valley is a very short-term bandage. It cracks, shrinks, and can even trap water where it shouldn’t be.
- Missing the real source: Sometimes the leak is actually from a nearby wall, dormer, or pipe flashing that empties into the valley. Replacing shingles alone won’t fix it.
- Safety risks: Valleys are naturally slick because that’s where water runs. Add steeper pitches or two-story heights, and you’re in serious fall territory.
By the time many homeowners call us, they’ve already removed shingles or metal, which exposes the valley to even more water if a storm hits before it’s rebuilt correctly.
What Professional Valley Repair Typically Involves
When we send a project manager out — like we did for Mark — the first step is diagnosis, not just patching. We want to know:
- Is the valley metal rusted, undersized, or improperly installed?
- Is there adequate ice and water shield or underlayment beneath it?
- Is the framing underneath sagging or dipped?
- Are there other leaks feeding into the same area?
Once we pinpoint the cause, a typical valley repair might include:
- Carefully removing shingles and flashing in and around the valley.
- Inspecting and repairing any damaged decking beneath.
- Installing new underlayment and ice/water shield in the valley area.
- Installing new valley metal or rebuilding a shingle-style valley to current standards.
- Tying new materials cleanly into the existing roof so both sides shed water properly.
For older additions or heavily worn roofs, we’ll sometimes recommend replacing the entire valley section rather than piecing in tiny patches. It costs more upfront, but it’s far more reliable and usually saves money over repeated small repairs.
When to Call a Pro About a Valley Leak
If you’re seeing any of the signs we mentioned — especially around an addition — it’s worth having the valley inspected before the next big storm. Catching issues early can prevent wood rot, mold, and interior damage.
You don’t have to wait until water is actively dripping inside. If you know an addition created a complex valley, or you’ve already tried a DIY fix that didn’t hold, we’re happy to come out, take a close look, and explain exactly what’s going on up there in plain language.
That’s what we did for Mark: scheduled a time that fit his afternoon schedule, inspected the valley thoroughly, and then laid out repair options so he could choose what made the most sense for his home and budget. If you’re in a similar spot, don’t hesitate to reach out — those valleys may be small, but they do a big job, and they deserve to be built right.